This article was updated on October 8, 2021.

Distance learning, when set up correctly, can be effective and rewarding for both teachers and students. But without time to plan, taking your classroom online may seem intimidating. It doesn’t have to be! MeisterTask is the perfect tool to communicate with your students, ensuring they always have the information they need to reach the goals of the course.
If you’ve never used MeisterTask before, it is an intuitive, online task management tool. Tasks are displayed on project boards that follow a workflow, which you can design yourself. If this doesn’t make immediate sense, you can familiarize yourself with MeisterTask before you start setting up your online classroom. Otherwise, let’s dive right in.
There are many, many ways that teachers and students can use MeisterTask. But in this article, we focus on one use case that we think will provide you with the fastest, most transparent foundation for communication with your students. The purpose of this particular setup is to transform your syllabus into a project board that will serve as a central information point for students.
Why MeisterTask?
Not being able to stand in front of your class and communicate directly to students about upcoming assignments and due dates, means that students also can’t ask questions that the whole class hears. But this mass communication can still be elegantly achieved by using MeisterTask. Making your project board visible to all of your students allows them to access the materials they need, at any time. It also allows them to pose public questions so that you aren’t repeatedly answering students individually (can we get an amen!). Your project board, acting as a central repository, will reduce miscommunications and misunderstandings as you transition to a remote classroom. To set up your classroom in MeisterTask, we recommend following the steps outlined below.
1. Create a New Project
To get started, create a new project that will serve as your classroom. If you would like to set up your board first and invite the students once everything is prepared, don’t invite anyone in this step. If you want to get rolling as soon as possible, invite them now and be sure to set their role to Member. This way students can ask questions and cross their names off checklists in tasks.

2. Design the Workflow
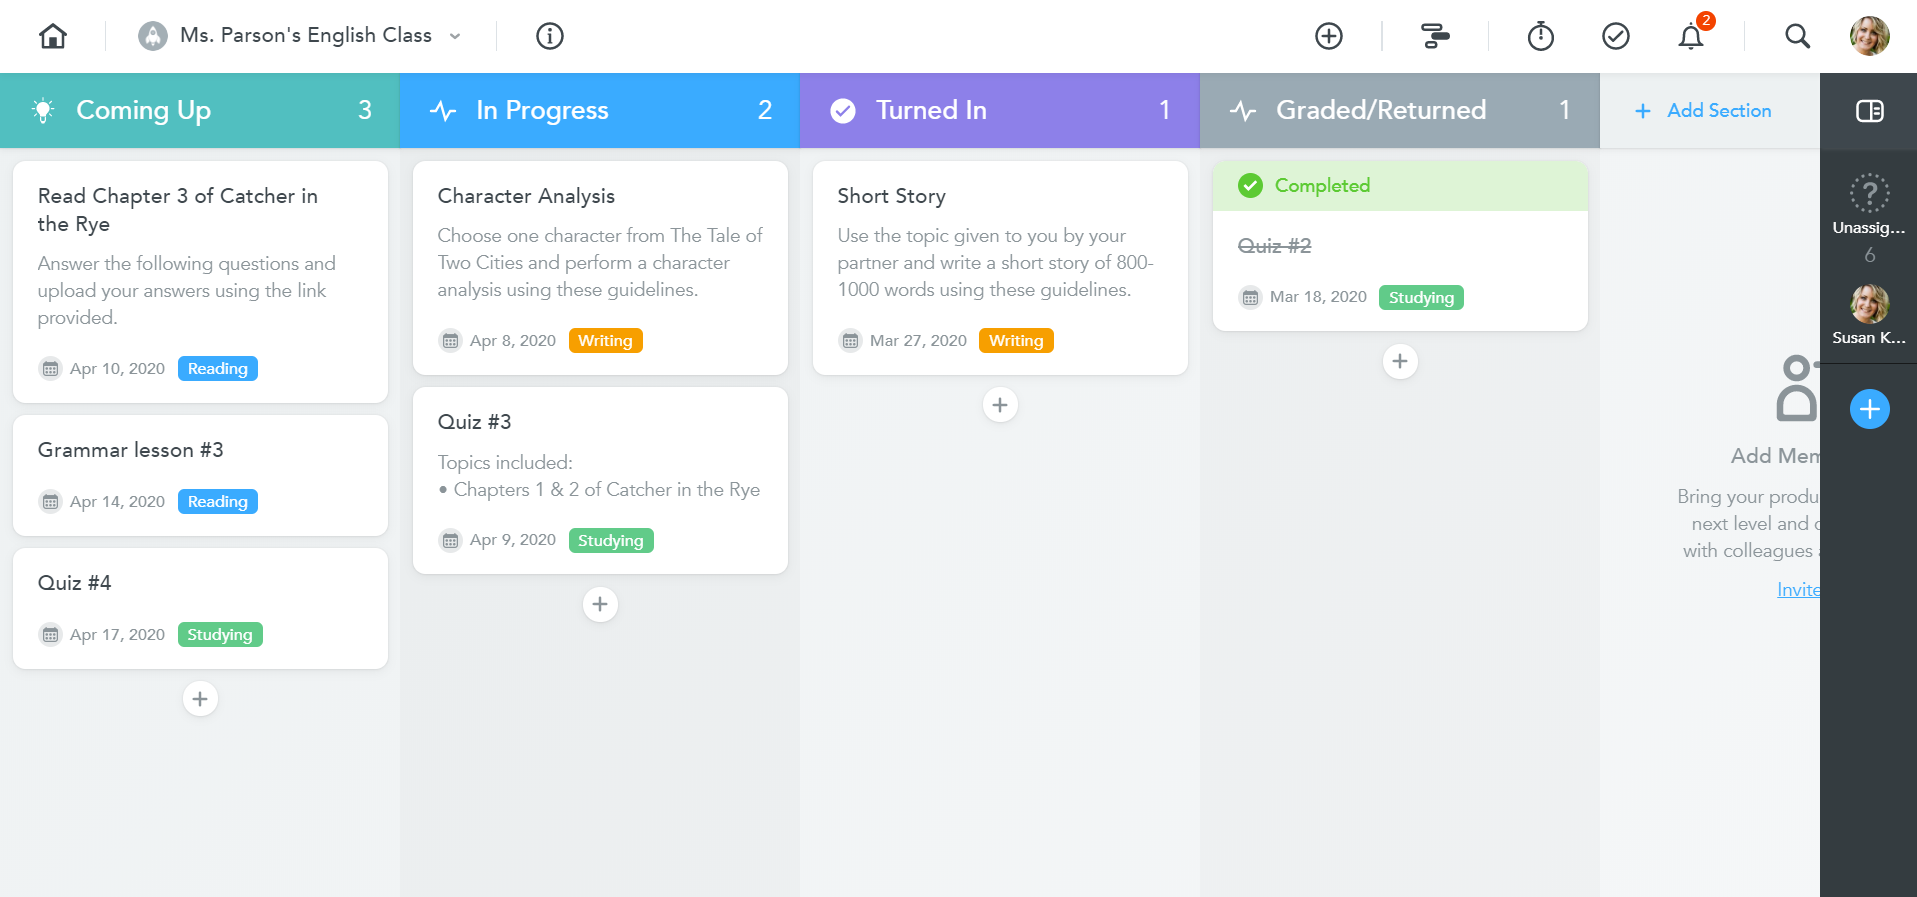
Based on what subject you’re teaching, how you teach or the age group of your students, you may want to set up your board in a variety of ways. In this example, we’ve displayed a simple workflow that moves assignments from creation to completion. Another style, such as organizing assignments by type or due date, or creating a weekly planner with a section for each day, might suit your needs better.
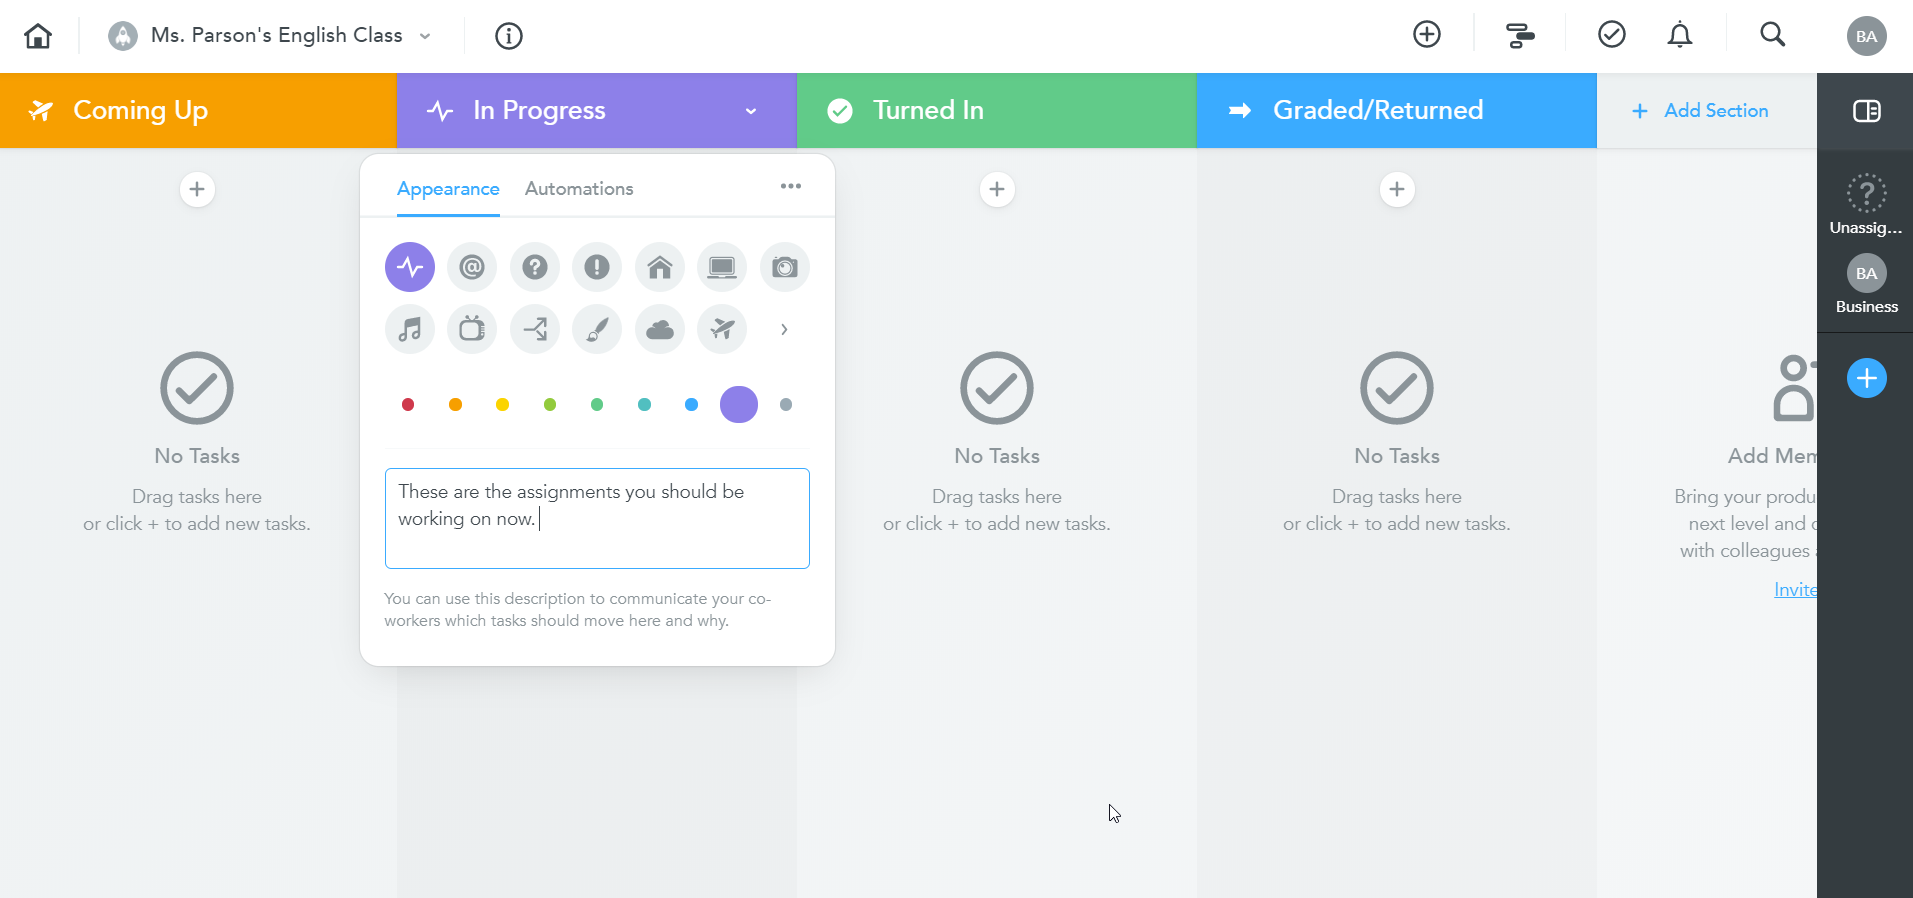
Once you’ve decided on the best workflow for visualizing your class, click on the name of a section to change it. Click on the arrow in the section header to change the color or icon, as well as set a description for your students as to what the section should represent.
3. Create Tasks
For each assignment your students need to complete, create a task. Many of the capabilities of tasks in MeisterTask will come in handy, and, again, this example is just one way to go about this. When creating tasks for your students, we recommend something like this:
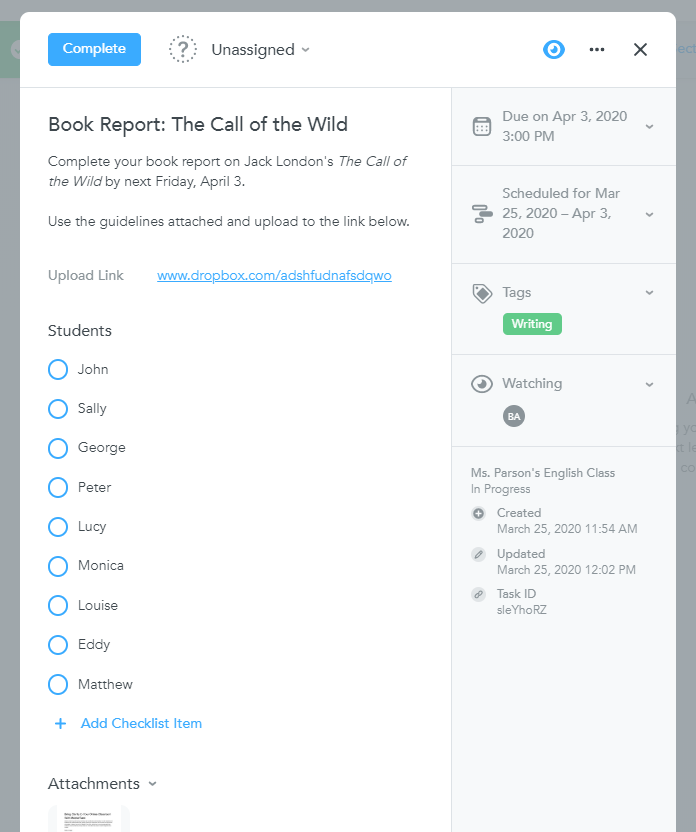
- Use the task description to tell your students what you would normally tell them about the assignment in class.
- If the students need any kind of material to do the assignment, be it guidelines, a worksheet, a mind map, an audio file or video, simply attach it to the task.
- Use custom fields to include an upload link for assignments that need to be collected. If you don’t have a system in place for doing this, there are several solutions out there, for example, File Requester from Dropbox.
- Set a due date for the assignment so that students can plan ahead.
- Schedule the assignment on the Timeline to let students know when they should be working on it.
- Use a tag to let students know what kind of assignment it is, for example, listening, reading, writing, etc.
- To keep this as interactive for the students as possible, create a predefined checklist with all their names and load it in the task. This way students can check off their own name once they have completed the assignment.
- Encourage your students to comment on the tasks, mentioning your name, to ask questions that everyone in the class can see. When you respond, all the students will see the answer, too.
- Ask your students to add themselves as watchers to the tasks in your project so that they can stay up to date with the progress and activity of the assignments.
4. Organize and Invite
Once you’ve got all your assignments set up as tasks, make sure they are on the board the way you’d like your students to see them. If you haven’t already done so, invite your students to the project as members. This way, they’ll be able to view and download everything, as well as cross their names off the checklists. If you’re worried that students might accidentally change something in a task, don’t fret. You’ll always be able to see what happened in the activity stream at the bottom of a task.
5. Keep Calm and Carry On
As this board functions as a central information point for all the students in your class, they can’t move or complete the tasks individually. It will be up to you to move the tasks through the workflow as the course continues.
Students can keep track of what they have to do by pinning tasks to their own agenda. Agenda is a personal board, individual to each user. If each teacher sets up a project board for their class, a student could then pin assignments from all their classes to their agenda. By doing this, students create their own overviews of all the assignments they need to get done, across all classes. To read what we’ve put together to get your students started, check out the student guide.
Ready, Steady, Go!
This is only one way that you and your students can use MeisterTask, and we’ve presented it this way to get you started as quickly as possible. That doesn’t mean that it’s the best way for you or that you shouldn’t experiment. Please do so and let us know how it goes! We would love to share with other educators and students around the world, the various ways that MeisterTask is being put to use.
If you need more help setting up, please visit our MeisterTask support website. For inspiration, ideas and tips, please visit our blog. And, of course, if you hit any bumps along the way, do reach out to us — we would like to help!